WEBMIN is a control panel for system administrators of both dedicated and VPS Linux servers. It is popular with super geeks who may use it for a quick access interface for remote control of their servers. I tried WEBMIN and can be corrected on this, but looks as though the control panel is more suited for dedicated servers as it ran quite slow on my VPS. If one would use it with a VPS it should have a minimum of 1 GB RAM on it. For someone with a VPS who is reasonably Linux literate particularly on the technical side of things, WEBMIN is definitely worth checking out. WEBMIN can be used by any web browser and can help one set up user accounts, Apache, DNS, firewalls, file sharing and much more.
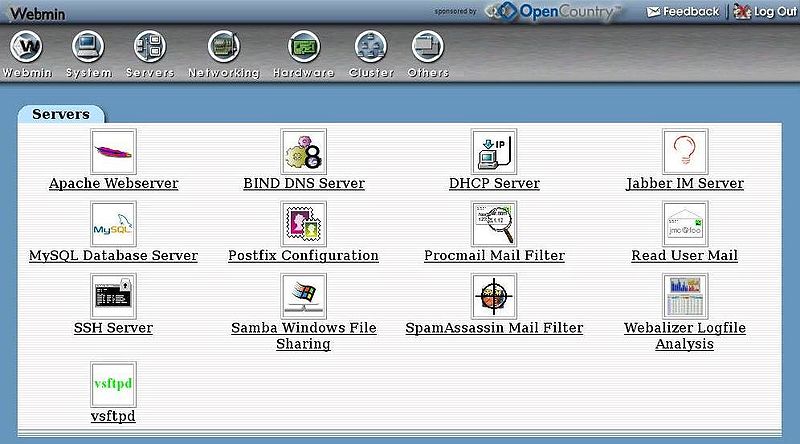
Here is what the panel looks like:
How to install WEBMIN
This is an excellent tutorial by Anthony Binns:
Following are the steps in the video, just in case something happens to the video:
Step 1: Log into PuTTY
Step 2: Google Webmin
Step 3: Click on downloads
Step 4: Click on link for CentOS RPM download
Step 4: Right-click direct link and copy link location
Step 5: Go back to PuTTY and type wget + link
wget http://downloads.sourceforge.net/project/webadmin/webmin/1.720/webmin-1.720-1.noarch.rpm?r=http%3A%2F%2Fwww.webmin.com%2Fdownload.html&ts=1419525128&use_mirror=liquidtelecom
Step 6: Do a directory of PuTTY
dir
Step 7: Copy Webmin file in directory.
Step 8: Write the command rpm -ivh + paste the file
rpm -ivh webmin-1.720-1.noarch.rpm?r=http%3A%2F
Step 9: Copy login link and open Webmin in browser. Should look like this:
IPnumber:10000
Step 10: Login information:
Username: root
Password: root password
WEBMIN Configuration
The WEBMIN default interface is not the greatest. To change the interface follow the following steps:
Step 1: Click on Webmin in the left panel and select “Change language and theme”
Step 2: Scroll down to “Personal Choice” and select “MSC Linux Theme”
Step 3: Click on “Make Changes”
Step 4: Exit WEBMIN and re-login for changes to take effect
