 I’m from a free hosting environment, and used to (perhaps even spoilt by) cPanel. However, cPanel for VPS comes very expensive at a huge license fee. This motivated me to do some research on available “free” Control Panel alternatives. Each and every one I tried came with negatives. VestaCP was hands down the best free Control Panel available, however at the time had a few bugs that required more advanced knowledge. I then chose Webuzo Premium version and used it until 2016 when I changed to VestaCP.
Why WEBUZO?
WEBUZO is a brother/sister of Virtualizor and part of Softaculous and has a very close feel to cPanel about it. I wouldn’t recommend the free version of Webuzo as it is very limited and lacks the WordPress script. Felt even clumsy to use. However the 27.50 USD per year license is so little and to me worth every penny in the difference with the free version. Webuzo is feature rich, and easy to work with. Has more than one option for FTP and File Manager. Works perfectly with DNS, everything that is needed to manage Websites as a single user. It also has a discussion Forum where one can make inquiries and be responded to well within 24 hours.
I think the Twitter fans would love the fact that many of the functions such as installation and upgrades can be communicated through a Twitter (X) account.
WordPress is listed first in its long list of 316 Softaculous scripts that have been neatly categorized. I had a WordPress site up in less than five minutes. It automatically created my database and database user, without prompting me for those. Probably the easiest installation of WordPress yet.
What is also attractive to me is the wealth of how-to documentation in the WEBUZO blog. Easy to search on as well.
WEBUZO Installation
For your Linux novice in a Windows environment there is a little bit of a learning curve involved to install WEBUZO. But this is easily done with PuTTY. Just follow the steps below and enter and execute the commands as indicated:
Step 1: Start with a minimal installation of OS
In other words, go into Virtualizor panel and click on “OS Reinstall”.
Step 2: Update the software with the following command:
yum update
Step 3: Remove Apache Server with the following command:
yum -y remove httpd
Step 4: Go back into Virtualizor and restart the VPS.
Step 5: Download installer script for Webuzo:
wget -N http://files.webuzo.com/install.sh
Step 6: Fix permissions with the following command:
chmod 0755 install.sh
Step 7: Use this command to automatically download WEBUZO:
./install.sh
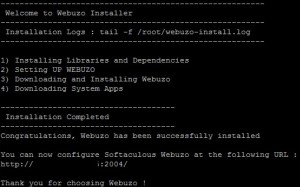
WEBUZO will start installation and this page will come up line by line – may take anything from 10 minutes plus depending the speed of the server. While I was experimenting I installed WEBUZO a few times and it took from 15 to 25 minutes for the installation to complete.
Step 8: Use your favourite browser and type in your IPaddress:2004 in the address line. And you’re up and running with WEBUZO. As easy as that.
WEBUZO 500 Internal Server Error – Troubleshooting
It may not happen to you, but for some or other reason it does happen with some and it did happen to me. After installation of my first Website I faced a 500 Internal Server Error page. Then thank goodness WEBUZO had some available solutions in its documentation:
Solution 1: Change root owner of domain with the chown command:
chown -R gigavps:gigavps /home/gigavps/public_html
That didn’t work for me.
Solution 2: Next solution was to find .htaccess and rename it so it would be disabled. That didn’t work either.
Solution 3: Remove Apache and re-install in WEBUZO. You’ll recall that the first step in WEBUZO installation was to remove Apache server (refer command in step 3 of the WEBUZO installation above). WEBUZO blog recommends to do it again. When I executed the command again root indicated that the package was available for install, but that the server wasn’t installed. Yet in WEBUZO it said it was installed. So here are the steps for fixing the Apache Server in WEBUZO. Very easy!
Step 1:
Navigate to Webuzo Enduser Panel >> Apps >> WebServers >> Apache. Click on the “Remove” button to remove Apache >>
Step 2:
.. >>“Return to Overview” >> Click on the “Install” button to install Apache.
This fixed the problem!
Source for solutions: http://www.webuzo.com/blog/category/how-to
